Tutorial: Functional Reactive Programming in F# and WPF (Part 1)
Posted on March 28, 2014When it comes to programming, my least favorite thing to work on is GUI back-ends. Traditional GUI programming involves a lot of mutable variables which represent the current state of your program; if at any point you want to modify part of the program, very often you have to take all of the potential states of your program into account. Things really start to get fun when there is more than one developer working on the project; the majority of the bugs I fix for Dynamo involve the user interface, and most often it’s because of actions occurring in an incorrect state.
Reactive Programming aims to solve a lot of these issues. In a nutshell, all user-interaction with the UI can be represented as events; you can write code that responds to events by updating some state and UI. This isn’t a new concept: anyone who has written applications in .NET is probably familiar with events. Reactive Programming takes events to the next level by allowing you to generate new events from existing ones: you can take an event that’s fired when a Button is clicked, and make a new event that gets fired only when the Button was clicked with the left mouse button. You can take two events and combine them into a single event that’s fired when either original event is fired. You can turn an event into a new event that returns the last two results of the original event. This alone can cut down on the complexity of a GUI implementation, but eventually you will still be manipulating state. Enter: Functional Reactive Programming.
As people who follow this blog already know, I’m a pretty big Functional Programming evangelist. Programming in a state-less style makes programs easier to reason about, easier to abstract and make modular, easier to test, and–once you get the hang of it– easier to write. Unfortunately, when it comes to GUIs, Functional Programming usually falls short; eventually you will have to handle the state of your application as users interact with it. By combining Reactive Programming with Functional Programming, however, you can minimize the amount of stateful code in your application, and potentially limit it only to updating the interface itself.
In this tutorial, we will create a small application with somewhat complex user interaction and several moving parts. We will limit all mutative code to small modular commands which will be used to initialize and update the UI. Other than mutating fields on UI Elements, we will not be directly changing any application state. We will be writing this application in F# in order to take advantage of the facilities it provides for functional programming. Arguably we could implement this in C#, but if we’re writing functional-style stateless code then we might as well use a language that facilitates it. Lastly, we will be using Windows Presentation Foundation for the UI framework, which will make it easy to setup the UI and expose events to the application.
Part 1 of this tutorial will give us a very basic interactive application that we will expand on in later parts. For now we just want to get something working before worrying about things like architecture, MVVM, modularity, extensibility, etc.
Goal: Window with a rectangle that can be dragged around.
You can access the completed code on GitHub.
Step 1: Create our Project
To simplify things, we can use download a project template from the template browser in Visual Studio that is setup for an empty F# WPF application. The name of the template we want is F# Empty Windows App (WPF), but searching for “f# wpf” should make it appear as one of the top results.
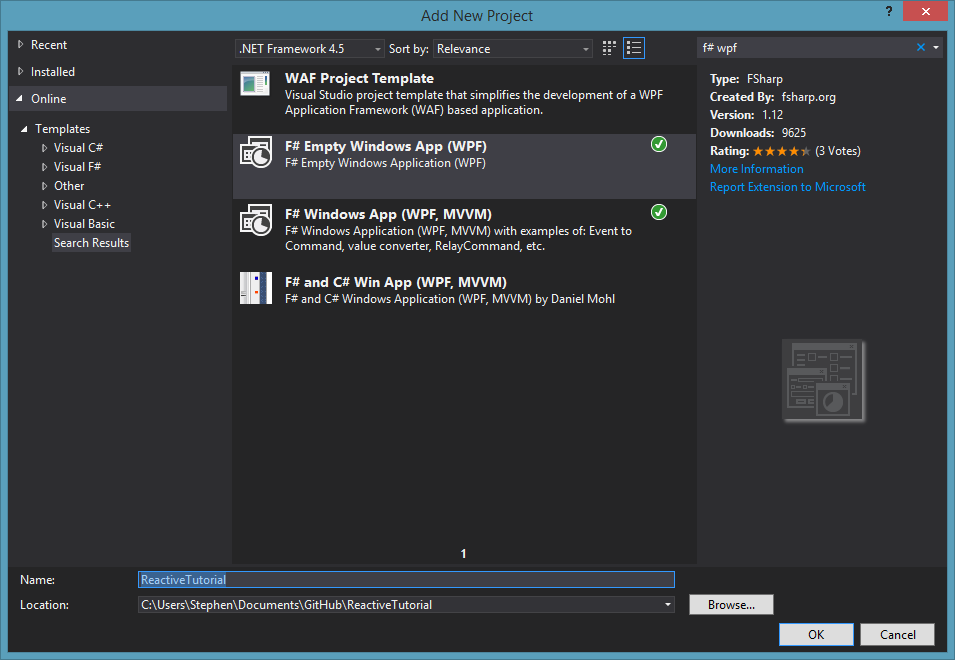
F# Empty Windows APP (WPF)
Using this template may cause a new Type Provider security warning window to appear in Visual Studio. This is just to allow static, strongly-typed access to the XAML file inside of the F# code, which is a nice feature to have.
The template will put a few files in the Project by default. The ones we’re interested in are MainWindow.xaml where we will define the View of the application, and App.fs where we will program the behavior of the application.
Step 2: Define our UI View
Inside of MainWindow.xaml we will define the UI Components of our application. Since the goal is to have a Rectangle that we can drag around, all we really need is a Canvas that contains a Rectangle. I slightly increased the size of the window, and then added a Canvas with a 100x100 black Rectangle inside of it.
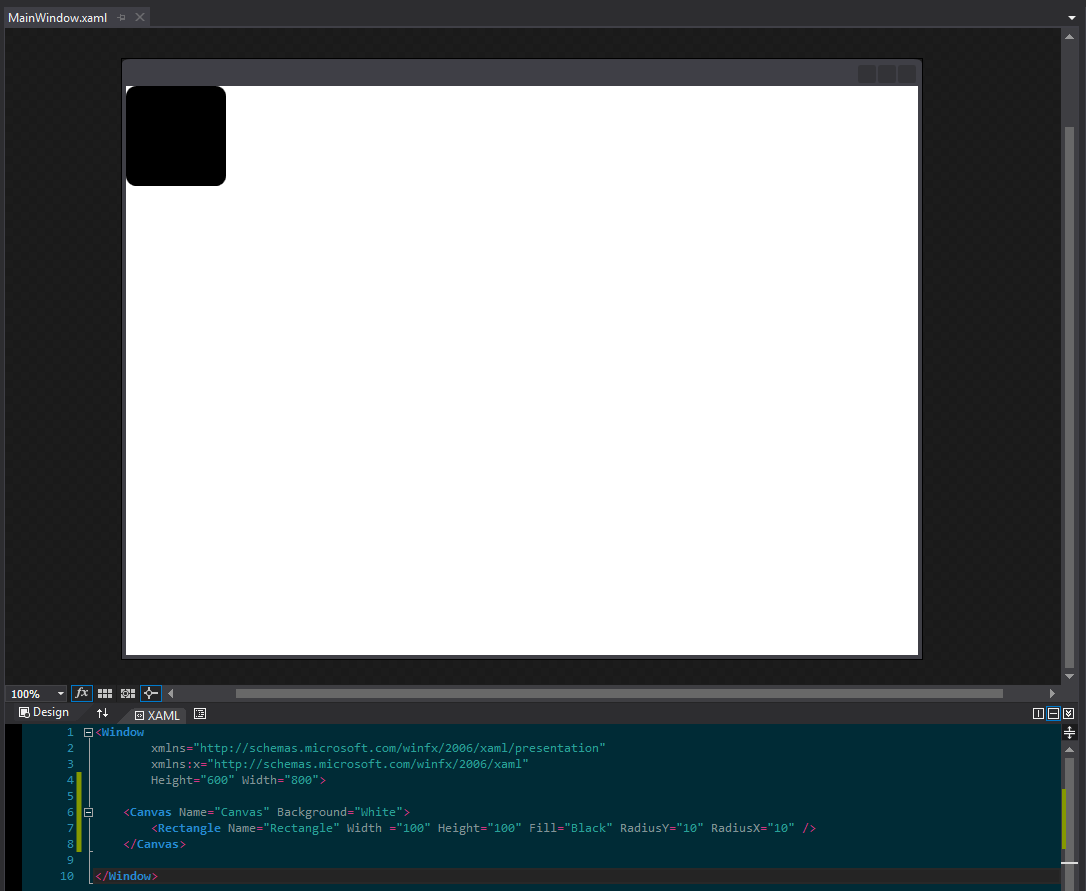
A Canvas with a Rectangle
The two components we’re really concerned with manipulating are the Canvas and the Rectangle, so I gave them both names so that they can be accessed via F#. The Canvas will be accessible through the Canvas property of the MainWindow instance, and the Rectangle through the Rectangle property.
Step 3: Setup our Application Logic
Looking at the code the template gave us, we see that there is a loadWindow function where a MainWindow is created and its Root property is returned. Like the comment says, this is where we can write awesome code that can access our XAML elements.
The eventual goal of the exercise is to be able to drag around the rectangle and have its position update as the mouse pointer moves. To keep things simple, lets try to get a basic prototype working first.
Step 3a: Clicking anywhere on the Canvas will move the rectangle to that position
This is pretty simple to do, especially if you’re already familiar with events. The idea is: when the Canvas.MouseDown event is triggered, get the position of the mouse and move the rectangle the that position.
The System.Observable module gives us access to several functions that will be the basic building blocks of a reactive workflow. The key type here is the IObservable<'a> interface, which represents a stream of data. Events in F# implement the IObservable<'a> interface; events are technically a stream of the data they produce when they are triggered. We can use the Observable.subscribe function to connect a handler to an event.
let mouse_down_handler (args : Input.MouseButtonEventArgs) : unit =
    let mouse_position = args.GetPosition window.Canvas
    Canvas.SetLeft(window.Rectangle, mouse_position.X)
    Canvas.SetTop(window.Rectangle, mouse_position.Y)
let subscription =
    Observable.subscribe mouse_down_handler window.Canvas.MouseDown
This is pretty straightforward: the bottom line is where we subscribe to the Canvas.MouseDown event with our handler function, mouse_down_handler. This function first gets the position of the mouse relative to the Canvas, and then sets the Rectangle’s position to match the mouse position. The Observable.subscribe call returns an IDisposable which we can use to terminate the subscription, thus unregistering the handler from the event. For the purposes of this tutorial we will not be cancelling any subscriptions in the middle of the program, but it’s good to know that it’s there.
At this point you can compile and run the program! The UI you designed in the XAML file will appear, and clicking anywhere on the Canvas will move the Rectangle such that the top-left corner is where the click occurred.
What we have currently is a good start; we have a handler reacts to user interaction. It doesn’t give us a great idea about how data flows, however. To demonstrate, first let’s break apart mouse_down_handler:
let get_canvas_position (args : Input.MouseButtonEventArgs) : Point =
    args.GetPosition window.Canvas

let set_rect_position (position : Point) : unit =
    Canvas.SetLeft(window.Rectangle, position.X)
    Canvas.SetTop(window.Rectangle, position.Y)
The functions in the Observable module give the ability to transform the data stream. I like to think of these transformations as pipe-lining the data, since you can compose them in the order the data will pass through them. Basically, the Observable functions allow you to create new IObservable<'a> instances from existing ones, where they take the data from the existing one and then transform it.
The first function we’ll look at is Observable.map. If you’re familiar with mapping over lists with List.map, this should look familiar. The function takes an IObservable<'a>, a transformation function of type ('a -> 'b) that is used to transform the data coming through the stream, and returns a new IObservable<'b> representing a stream of the transformed data.
With this in mind, we can re-write the subscription portion of the application:
let subscription =
    Observable.subscribe
        set_rect_position
        (Observable.map get_canvas_position window.Canvas.MouseDown)
When I work with the Observable module, I like to use the |> forward function application operator to represent the order that the data flows through the stream:
let subscription =
    window.Canvas.MouseDown
    |> Observable.map get_canvas_position
    |> Observable.subscribe set_rect_position
So now you can try to compile and run the program again, and see that it’s working exactly the way it was before we changed the code, which is a good thing. You may be wondering what the point of changing the code was. Besides demonstrating what the data flow looks like, it also makes the code a lot more modular, which is useful when you’re working on UI applications.
Step 3b: Only allow left-clicks
Right now the rectangle will move to where the cursor is when the user clicks any of the mouse buttons. Let’s change that so that it only moves if the user clicks the left mouse button. We can quickly define a function that can check that from a MouseButtonEventArgs instance:
let is_left_click (args : Input.MouseButtonEventArgs) : bool =
    args.ChangedButton = Input.MouseButton.Left
And then we can use Observable.filter to filter the stream so that only data coming from a left mouse click progresses:
let subscription =
    window.Canvas.MouseDown
    |> Observable.filter is_left_click
    |> Observable.map get_canvas_position
    |> Observable.subscribe set_rect_position
If you compile and run at this point, you should see that the rectangle only moves when clicking the left mouse button in the Canvas. Using any of the other buttons will result in nothing happening. This is due to how Observable.filter works: all data coming into the filter is passed through the given function, in this case is_left_click. If the function returns true, the data is passed along the stream. If it returns false, it is stopped and the rest of the stream will not receive the data.
Step 3c: Modify prototype to allow for dragging
Now that we have our prototype working and understand how we can express data flow from events into handlers, we can implement actual dragging. A drag operation actually requires some state management: we’ll need a flag that indicates whether or not the mouse is being held down, and we’ll use this flag to determine whether or not we should be updating the rectangle’s position as the mouse moves. The question is, if we’re avoiding mutation, how do we properly handle this kind of stateful interaction?
First, let’s represent what a drag operation looks like:
type DragState = { dragging : bool; position: Point }We have a data structure that keeps track of whether or not we’re dragging, and where the current position of the drag is. Now, let’s write some utility functions that can update this structure:
let update_dragging (dragging : bool) (state : DragState) : DragState =
    { state with dragging=dragging }

let update_drag_pos (position : Point) (state : DragState) : DragState =
    if state.dragging
    then { state with position=position }
    else state
With these in hand, we can now work on defining the behavior of the drag operation within the application. When the Rectangle.MouseDown event is triggered, we want to set the dragging flag to true. When the Canvas.MouseUp event is triggered, we want to set the dragging flag to false. Finally, when the Canvas.MouseMove event is triggered, we want to update the position.
The trick to managing the state between these three events is the Observable.scan function. This function takes in a state manipulation function of type ('a -> 'b -> 'a), an initial state of type 'a, and an IObservable<'b>. It returns an IObservable<'a>. From the types alone it’s simple to deduce what Observable.scan does: 'a represents the type of the state, and 'b represents the type of data flowing in. When data comes in via the given IObservable<'b>, it is passed to the state manipulation function along with the current state. This function returns a new state which will then be used when the next piece of data comes in. The first time data comes in, it will use the given initial state. Each time the state updates, the new state comes out of the result IObservable<'a>.
Of course, the Observable.scan function only accepts one IObservable as an input. We have three events that will need to modify this state. We can combine the three events into a single IObservable by using the Observable.merge function. This function takes two IObservable<'a> instances, and returns one new IObservable<'a> that receives data from each of the original ones. This is the last piece of the puzzle; we have all the tools we need to create our drag operation.
One nice thing about reactive programs is that they lend themselves to flow charts. This flow chart represents the entire drag operation:

Diagram showing how all inputs affect the rectangle.
We can use this flow chart to write the code piece by piece. First, we need to represent what a change to the DragState is:
type DragChange = StartDrag | StopDrag | UpdatePosition of PointNext, we need to transform our event streams so that they produce the appropriate change commands:
let start_stream =
    window.Rectangle.MouseDown
    |> Observable.filter is_left_click
    |> Observable.map (fun _ -> StartDrag)
let stop_stream =
    window.Canvas.MouseUp
    |> Observable.filter is_left_click
    |> Observable.map (fun _ -> StopDrag)
let move_stream =
    window.Canvas.MouseMove
    |> Observable.map (get_canvas_position >> UpdatePosition)
We also need to adjust the signature of get_canvas_position to match the data coming in from the MouseMove event:
let get_canvas_position (args : Input.MouseEventArgs) : Point =
    ...
We can then write a function that takes in a DragState and a DragChange and produces a new DragState:
let update_drag_state (state : DragState) (change : DragChange) : DragState =
    match change with
    | StartDrag -> update_dragging true state
    | StopDrag -> update_dragging false state
    | UpdatePosition(pos) -> update_drag_pos pos state
We also need to define our initial state:
let initial_state = { dragging=false; position=new Point() }Finally, we need a function that checks if a drag is active, and a function that gets the new drag position:
let currently_dragging (state : DragState) : bool = state.dragging
let get_drag_position (state : DragState) : Point = state.position
And now we just construct the flow chart using all of our defined functions as building blocks:
let subscription =
    Observable.merge start_stream stop_stream |> Observable.merge move_stream
    |> Observable.scan update_drag_state initial_state
    |> Observable.filter currently_dragging
    |> Observable.map get_drag_position
    |> Observable.subscribe set_rect_position
At this point, you should be able to compile and run the application. When you left-click on the rectangle and move the mouse without releasing the button, the Rectangle will follow the cursor!
Step 3d: Perform drag while keeping the rectangle in the same position relative to the cursor
Currently, no matter where you click on the Rectangle, as soon as you move the mouse it moves so that the top-left corner is under the cursor. To demonstrate how straightforward it is to modify our workflow, let’s fix this.
First, we need to remember what position we started the drag from, relative to the Rectangle. We can add another entry in our DragState structure to track this:
type DragState = { dragging : bool; position : Point; offset : Point }With that added, we can change get_drag_position to take the offset into account:
let get_drag_position (state : DragState) : Point =
    let diff = state.position - state.offset
    new Point(diff.X, diff.Y)
Next, we need to make sure that the offset is recorded when the drag starts. To do this, we must first update DragChange.StartDrag to track the offset:
type DragChange = StartDrag of Point | StopDrag | UpdatePosition of PointAnd then modify update_drag_state to pass the offset to the state:
let update_drag_state (state : DragState) (change : DragChange) : DragState =
    match change with
    | StartDrag(offset) -> { state with dragging=true; offset=offset }
    ...
Finally, we need to update start_stream so that the offset is recorded from the Rectangle.MouseDown event. First, let’s refactor get_canvas_position so that we can get the position relative to any UIElement, as opposed to just the Canvas:
let get_mouse_position (rel_to : IInputElement) (args : Input.MouseEventArgs) : Point =
    args.GetPosition rel_to

let get_canvas_position = get_mouse_position window.Canvas
let get_rectangle_position = get_mouse_position window.Rectangle
With that done, we can easily update start_stream to get the dragging offset:
let start_stream =
    window.Rectangle.MouseDown
    |> Observable.filter is_left_click
    |> Observable.map (get_rectangle_position >> StartDrag)
And that’s it! If you compile and run the program, now when you drag the Rectangle, it doesn’t snap to the top-left corner, but stays in the same position relative to the cursor.
Summary
This tutorial has (hopefully) demonstrated the following key concepts:
- By using the
Observablemodule, events can be treated as data streams, which allows for easy, composable manipulation. - Stateful UI actions can be represented using a structure to represent the state, and another structure to represent how that state can be manipulated by the application. The
Observable.scanfunction can be used to connect these two structures. - Breaking your program down into functional building blocks makes it a lot simpler to modify the behavior of your application.
Of course, this is a pretty contrived and basic example. What happens when you have a lot more moving pieces and need to link a lot of events together? In later parts of the tutorial, we will attempt to scale these concepts up in a way that they can apply to any production-quality application. One important thing to take away now is that even though you can do these things in a traditional imperative style, strictly following the Functional Reactive Programming methodology forces you to write this kind of code in a way that is inherently safe(er) and more maintainable in the long run.